Pages

Showing posts with label gluten free. Show all posts

Tuesday, February 11, 2014

Angel Food Cake (sans Gluten)

Simple. Light. Sweet.
I remember when I was younger thinking it was impossible to make without a box mix. Now I wonder what magic they use to turn the few precious ingredients it takes to make an Angle Cake, into a box mix!
I urge anyone with 10 eggs and a mixer to avoid the box, and experience the pleasure of making this simple cake. Perfect for summer with how light it is, but dare I say even better in winter, when the cold, dark days have us dreaming of sunshine and fresh berries??


Angel Cake (no gluten necessary)
serves 8-12
If you don't have gluten free flours on hand, you can easily make this by just swapping the GF flours for one cup of all-purpose flour!
//Ingredients//
10 egg whites, preferrably room temperature
1 tsp. vanilla extract
1 tsp. cream of tartar
1/4 cup potato starch
1/4 cup + 2 Tbsp. brown rice flour
1/4 cup + 2 Tbsp. tapioca starch
1 tsp. salt
1 1/2 cups sugar, separated

//Method//
Preheat oven to 350F. Have your Angel Cake pan ready, and by this I mean just sitting on the counter ready to fill with your batter. Do NOT grease it! The cake has to be able to "climb" the walls. If you spray it, it will just slip down into a sad, dense heap of sugary mess.

Separate your whites from the yolks (don't throw away the yolks! This is a perfect opportunity to make a batch of ice cream...)

Combine the potato starch, brown rice flour, tapioca starch, salt and a 1/2 cup of the sugar. Sift them 3 times. This will ensure that your flour mixture is really light and fluffy!

In the bowl of your stand mixer (or in a big bowl if you plan to use a hand mixer) combine your whites and vanilla. Using a whisk attachment beat the whites on medium until frothy. Sprinkle in the cream of tartar and turn the mixer up a notch. Beat until the whites start to form soft peaks and begin looking shiny. Slowly sprinkle in the remaining 1 cup of sugar while the whites are beating. Beat on medium-high until stiff peaks have formed.

Gently fold a third of your flour mixture into the egg white mixture. Once it is pretty much incorporated, mix in another third and finally the last of it. You want to be as gentle as you can using a folding motion instead of a mixing motion so you don't deflate the air you have just worked into your whites. Pour your batter into your cake pan and smooth the top.

Bake in the center of your oven for 18 minutes, then rotate, and bake for 17 more.

Once you remove the cake from the oven it will need to cool upside down so it doesn't sink in on itself. My angel pan has feet so I can do this really easily. If yours doesn't, I think most people rest the center hole on a glass bottle (i.e. soda bottle.)

Once your cake is completely cool, just use a thin off set spatula or a butter knife to loosen it from the sides of the pan. It should come out pretty easily. The serving options are endless! Keep it light with fresh whipped cream and berries, or go my favorite route and make it dirty with coffee ice cream and rum spiked hot fudge sauce!


Wednesday, January 29, 2014

On My Needles: Onward, Climb, and The Baby's Blanket

Sunrising over our backyard

It is currently -7F here in our little part of Michigan, and that doesn't include the -30F windchill. The only proper thing to do is to surround myself in yarn, tea and maybe turn the oven on for some baking later.  I actually really love winter. But the winters you can participate in. Not so much the days where they warn you to not go outside for more than 5 minutes and your heating bill sky rockets to almost $300. Full of ice storms and wind sheers, power outages and dangerous roads. This kind of winter I would like to hit the fast forward button on. Thankfully though, I knit. And knitting really does make winter worth it. The cold air continues to push my motivation button, and I wish there were more hours in these short days.

So on my needles, keeping me busy as I am trapped inside...

Baby Girl Mowry's Blanket

The baby blanket is almost finished! I had to order more yarn because of the custimizations I made to the pattern, and those last 3 skeins arrived this afternoon! All of my notes can be found on Ravelry, but I will also do a post here with finished instructions for my alterations. I can't wait to finish it and have it all washed and cozy for her arrival in just 6 weeks! We attended our first birthing class last night and really enjoyed it. We are so happy we found a class that really seems to touch on everything that is important to us.  The excitement builds everyday as we get closer to meeting her!


After finishing the Spate mitts from Journey, I couldn't wait to get more of their projects on my needles. First off, I cast on for Onward. This pattern by Shannon Cook is simple, yet so satisfying and interesting. The shawl works up fairly big and in the book they have pictures of the model wearing it wrapped around her. So cozy! I thought it would double nicely has a nursing cover, and so I got to move it up higher on my priority-to-knit list.


This is the pattern I first really fell in love with from Journey. Jane Richmond  produced an incredibly simple pattern with such perfect accents (and color choices), that pretty much everyone on Ravelry has followed the pattern exactly, including the yarn choices! Simplicity makes these socks timeless and perfect.

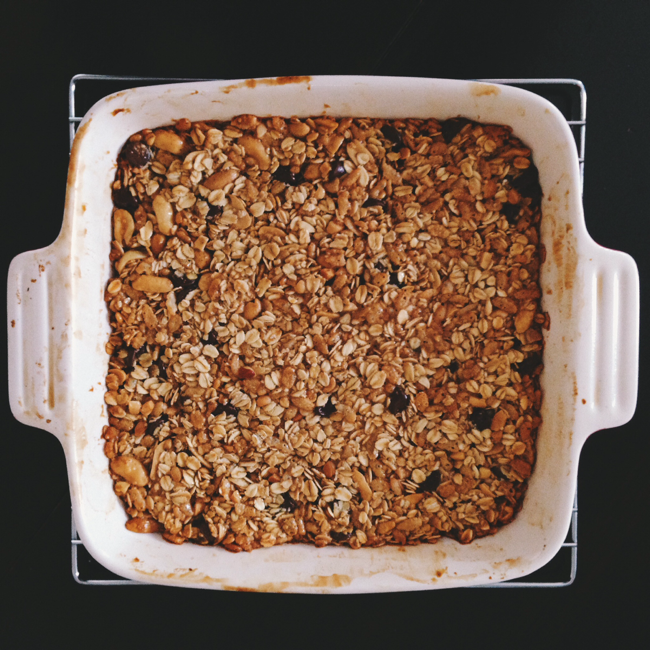
And just for fun...I did turn on the oven! So I could make a batch of these granola bars from Isa Does It. They are vegan, gluten free and refined sugar free.

Peanut Butter Chocolate Chip Bars
Recipe from Isa Does It
//Ingredients// makes 8 bars
1/2 cup natural peanut butter
1/3 cup maple syrup
1/3 cup brown rice syrup
1 Tbsp. canola oil
1 tsp. vanilla extract
1/2 tsp. salt
2 cups rolled oats
1 cup crisp rice cereal (aka Rice Krispies)
1/2 cup roasted peanuts
1/3 cup semisweet chocolate chips

//Method//
Preheat oven to 350F. Prep an 8-inch square pan with parchment and cooking spray.
In a medium size bowl, stir together peanut butter & syrups until smooth. Add in the oil, vanilla and salt and stir again. Mix in the oats and cereal. She suggest using your hands to knead it all together but I found my sturdy spatula worked just fine! Work in the peanuts and chocolate chips.
Pour mixture into your prepared pan and use wet hands to firmly pat the bars into the pan in an even layer. Bake for 22-25 minutes. Let cool completely before depanning and cuttting. Can be stored by wrapping the bars individually in plastic wrap.